Foreword
Since its release, there has been a huge misunderstanding about Atari BASIC.
In the eyes of journalists, it's not a good BASIC because it's relatively slow — and it is slow. I'll come back to this problem later. Some journalists even go so far as to say that Atari 8-bit machines are slow. It's very easy to debunk this nonsense.
What many journalists have missed is that it is, above all, an excellent BASIC for beginners, perhaps even the best BASIC for beginners of its time for 8-bit computers. And that's exactly what it was designed for: to help complete beginners discover their first programming language, without frightening them, without disgusting them forever, by guiding them and making their lives easier.
You have to consider the context at the time these computers came out. For most buyers, it was the very first computer. Very few people knew any kind of programming language. In fact, very few people even knew the concept of a programming language. We were starting from very far away.
Atari's intention was not to create a computer for hobbyists, but a computer for consumers — The term "consumer computer" is used in several Atari documents. It was imperative that it would be easy to use. Today we would say "user-friendly". Want some examples?
- The computer's connectors (Power, Monitor, SIO, Joystick, etc...) all use different plug formats, so it's impossible to make a mistake when plugging a cable.
- Commercial games and programs can be loaded and run without typing a single command.
- The [START], [SELECT] and [OPTION] keys standardised the use of any program. Want to start the game? Always press [START].
- The computer can produce highly sophisticated graphics and sounds, with the aim of interacting with its user in natural ways other than text.
- It is possible to add RAM memory to the Atari 800 without soldering and without any knowledge of electronics: just plug a special additional cartridge.
- Etc...
BASIC is a language that is easy to assimilate, with instructions that appear elementary but which can translate into dozens or hundreds of instructions for the 6502 CPU/microprocessor. BASIC hides all this complexity.
Atari BASIC is ideal for a "consumer computer". It is an excellent introduction to the basic principles of programming: sequences of simple instructions, easy to read and understand, that can be assembled to create a complex program. Atari BASIC is the ideal language for learning the concepts of variables, loops, Boolean logic and conditional branching, error handling, etc. Atari BASIC enables complete beginners to create and use graphics and animations, to produce music or sounds, to access files on a floppy disk drive, etc.
Besides, discussing the execution speed of a BASIC language in general is really a secondary subject. That's not what we're expecting from it. There has never been any question of developing arcade-style video games or professional software with BASIC — even with the best BASIC available, that's absurd: BASIC wasn't designed for that. An Atari developer, if they claim to be a professional, must master the 6502's machine language using assembler{1} or other languages such as Action! from OSS, for example. Machine language is a much more difficult language to master, but since it is the 6502's native language, it's the one to use for maximum speed.
{1} Assembler is machine language masked with alphabetic mnemonics and labels to make it readable by a human being.
Instead of reading a program listing that indicates the code of the instruction executed by the 6502, you read an understandable code in English: LDA (Load Accumulator), STA (Store Accumulator), JMP (Jump), ADC (Add with Carry), CMP (Compare), and so on ... in lieu of $AD, $8D, $4C, $6D, $CD.
Assembler can be translated directly into machine language.
At the end of the day, it's important to remember that the 6502 understands only one language: the 6502 machine language.
To criticise Atari BASIC for being slow and preventing the creation of a arcade-style video games is above all a lack of discernment about the true usefulness of a BASIC language, but also and above all an admission of incompetence in the field of development.
History
From the very beginning in 1978, Atari's intention was to buy a licence for a BASIC that was commonly used at the time — Microsoft BASIC — and to offer it as standard BASIC on the future Atari 400 & 800. Two slightly different versions of Microsoft BASIC were available for 6502 CPU/microprocessor, but they were poorly documented. What's more, Atari obviously wanted to add instructions to take advantage of the Atari 400 & 800's extraordinary graphics and sound capabilities, joysticks and paddles, and so on.
Since Microsoft wasn't much help, Atari solicited the help of an outside company in September 1978: SMI (Shepardson Microsystems Inc), which already had a great deal of experience in developing BASIC on the 6502. Very quickly, SMI suggested dropping the idea of using Microsoft BASIC{2}{3} and proposed another version, built using Atari's technical specifications. SMI delivered Atari BASIC (along with Atari DOS I) in December 1978.
{2} To stop reading reccurent, unpleasant comments in magazines pointing out that Atari BASIC was not an offshoot of Microsoft BASIC, Atari ended up offering its own Atari Microsoft BASIC in 1981, two years after the launch of Atari BASIC.
In 1981, the first version was released on diskette (Atari Microsoft BASIC, CX8126 from AtariMania).
In 1982, a second improved version on cartridge + diskette (Atari Microsoft BASIC II, RX8035 from AtariMania).
{3} This is how Atari advertised the Atari Microsoft BASIC and the Atari BASIC in publications around 1982. I have scrupulously respected the use of upper and lower case letters as they appear in the advertisement.
(this one is from Compute! Magazine, September 1982, issue 28, page 7):
ATARI Microsoft BASIC — Now we offer the industry standard, the most powerful Microsoft BASIC yet. With simple commands, it allows you to take advantage of unique Atari hardware features such as our well-known player/missile graphics [that is, sprites]. For ease of programming, it includes n-dimensional arrays for numerics and string handling. And importantly, conversion procedures are simple.
ATARI BASIC — An affordable and easy to use BASIC that requires only 8 KiB of memory. It allows you to take advantage of the spectacular ATARI graphics and sound capabilities. And its immediate mode error messages greatly simplify debugging.
And now the question on everybody's lips: "Why can't Atari BASIC handle string arrays?"
According to an article by Bill Wilkinson in Compute! Magazine, February 1982, issue 20, page 83 the best reason is that they had to make a choice: either implement string arrays, or immediately check the syntax of any new program line: something essential for beginners.
As a matter of fact, Atari was aiming for the educational market where the Hewlett-Packard HP2000 (with 72-characters Atari-style strings) was the de-facto standard. Atari considered from the start in 1978 that the Atari 400 & 800 models were serious computers for learning — and not only excellent computers for gaming! — and had to be promoted for the educational market.
Note that the very first cartridge, CXL4001, is "Educational System — Master cartridge" for which 64 courses have been developed, including 16 educational software cassettes released by Atari. Later still, in 1983, with the help of Dickinson College, Atari launched the AtariLab series — boxes of software and hardware for conducting scientific experiments. Positioning Atari computers in the educational market was a real priority for Atari.
It should also be pointed out that a very strong technical constraint had to be respected for the creation of Atari BASIC: as the Atari 400 & 800 were designed as easy-to-use machines, BASIC would be offered on an 8 KiB cartridge so that it would be available immediately, when the computer was started up — and not in the form of software to be loaded from diskette or cassette tape{4}. So, the "must fit on an 8 KiB cartridge" constraint was central to the user experience. Atari at one point considered using the 2nd cartridge slot ("RIGHT CARTRIDGE") of the Atari 800 to offer a 2nd cartridge that would complement the existing Atari BASIC in the 1st cartridge slot with an extended version, of 8 KiB + 8 KiB = 16 KiB. This 2nd cartridge never materialised.
{4} Loading an external BASIC from diskette or cassette tape complicates and slows down the boot process. Of course, there are also advantages, such as the possibility to have a BASIC on 10 KiB or more. Or the possibility to offer a new version more quickly, and at a limited cost. But it also assumes that the computer user owns a floppy disk drive or a cassette tape player/recorder.
So, to "squeeze" Atari BASIC into 8 KiB, compromises had to be made.
For instance:
- The FPP (Floating Point Package) routines module has been moved to ROM, and is part of the system OS — although it is never used by the OS.
- No classic instruction like
CLSin Atari BASIC, because an equivalent exists:GR.0abbreviation ofGRAPHICS 0. - The I/O routines as well as the graphics{5} routines are in fact implemented in the OS, and simply "called" with the expected parameters by Atari BASIC.
One oversight: theFILLfunction for filling a shape on the screen exists in the OS but is not available directly in Atari BASIC: you have to use the genericXIO 18instruction. - There are no graphical instructions for drawing circles or ovals in Atari BASIC: you have to draw them yourself point by point, with the slowness you can imagine for sine and cosine calculations in BASIC.
- More embarrassingly, there were no instructions for building and managing sprites (players-missiles in Atari's vocabulary) in Atari BASIC, a decisive factor in the graphic superiority of Atari 400 & 800 computers over their competitors at the time: you had to use
PEEKandPOKEinstructions to implement them. - The Atari BASIC
SOUNDinstruction allows you to create fairly basic sounds on 4 separate 8-bit channels with the POKEY chip, whereas you can aggregate 2 channels to obtain a 16-bit channel withPOKEinstructions for instance. Even worse, theSOUNDinstruction does not manage the duration of the sound, nor its envelope...
{5} Have you ever wondered how the same Atari BASIC, REV. A from 1979, miraculously handles the additional graphics modes that were implemented in 1982 and 1983, long AFTER that version of Atari BASIC was released? I'm talking about the additional graphics modes that appeared when CTIA was replaced by GTIA, and about the additional graphics modes that appeared with the 1200XL?
The answer is simple: Atari BASIC doesn't know which graphics modes are actually available on the computer it is running on. More generally, Atari BASIC knows nothing of graphic modes, display lists, character sets, color registers, etc. Atari BASIC simply knows which parameters to use to call routines which, in fact, are implemented in the OS (operating system), and are therefore subject to change and update.
It may seem surprising and puzzling, but all the graphic instructions available in Atari BASIC are in fact simple instructions, nice and friendly to use, which all mask simple calls to routines that are all implemented in the OS.
However, no compromises have been made to undermine the excellence of the user experience. Atari BASIC is one of the best BASICs for beginners, thanks to its flexibility and exceptional editor.
Available versions
Three versions are available, known as "REV. A", "REV. B" and "REV. C".
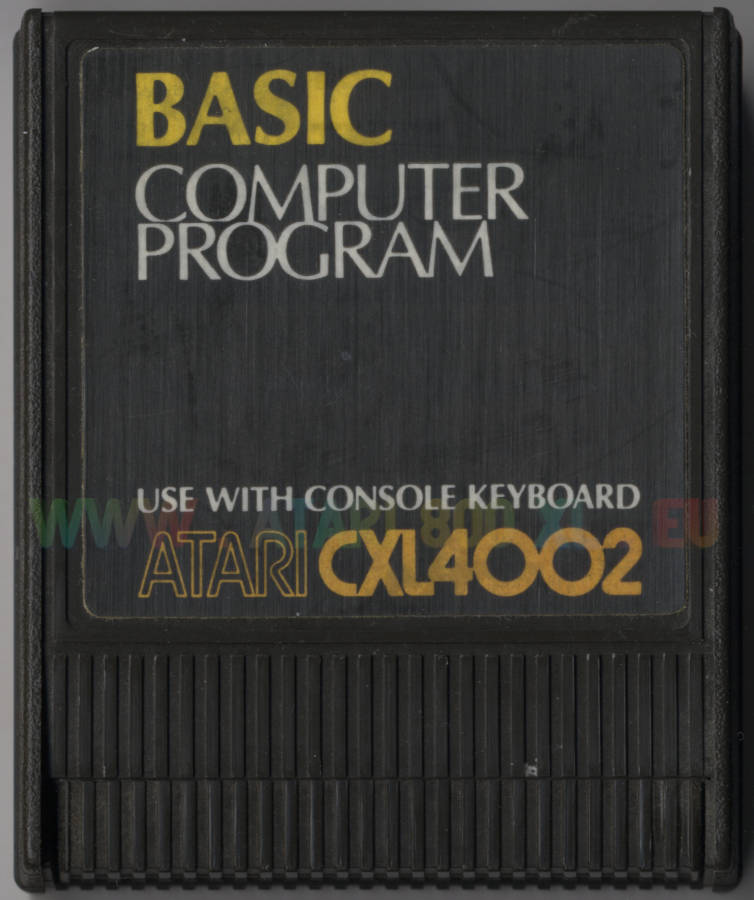
Revision A ("REV. A") is the initial version. It is only available as a cartridge (CXL4002).
A PRINT PEEK(43234) gives 162 if you have this version.
Revision B ("REV. B") fixes bugs in revision A but introduces others. It has never been available as a cartridge. It was found on the first 600XL and 800XL.
A PRINT PEEK(43234) gives 96 if you have this version.
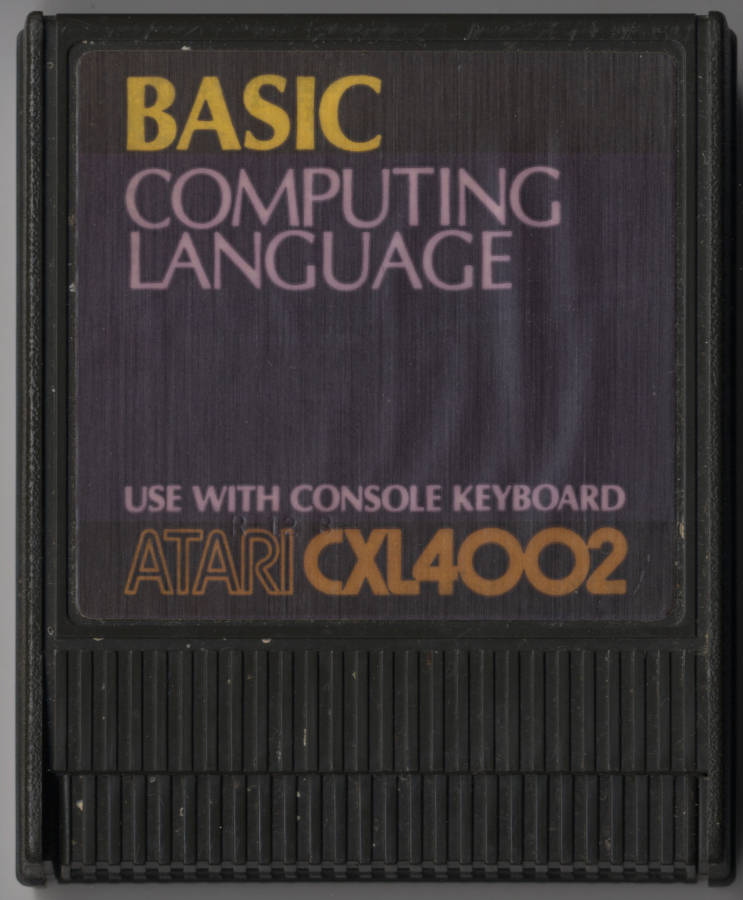
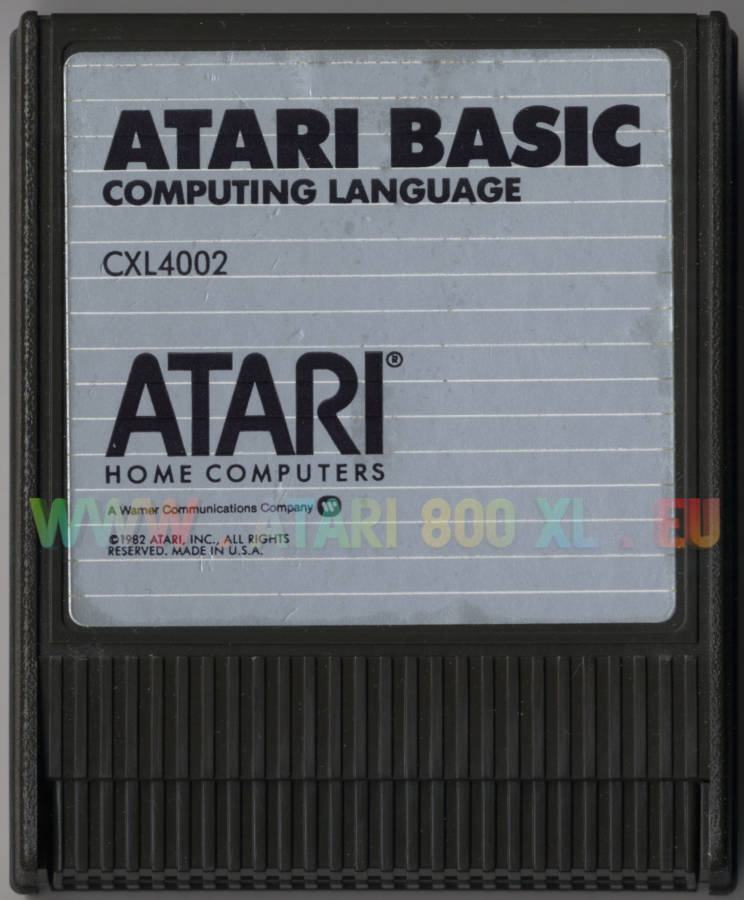
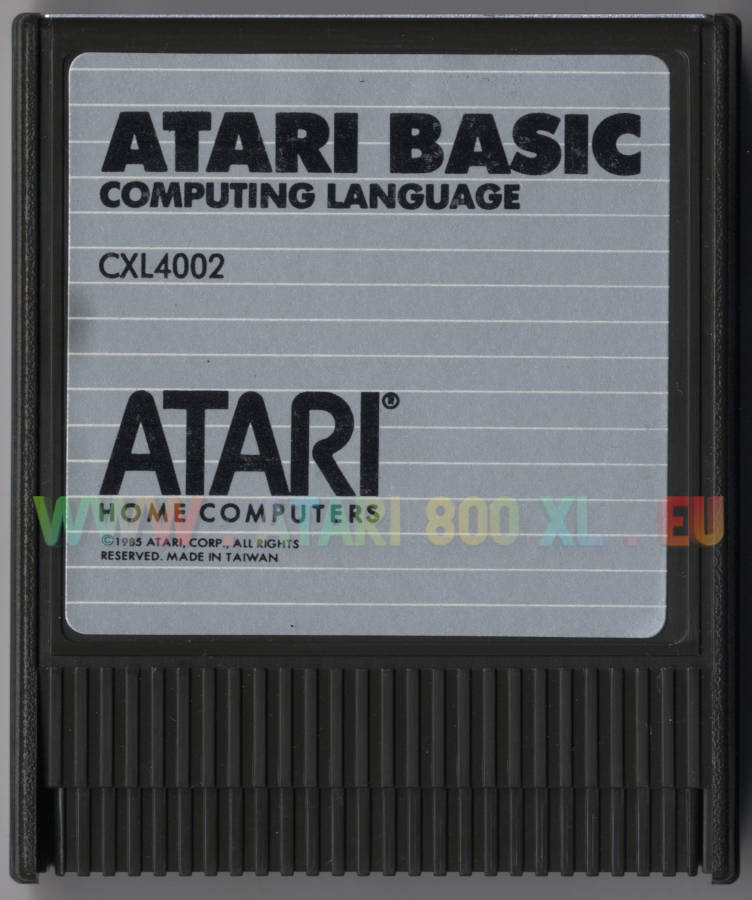
Revision C ("REV. C") corrects bugs found in previous versions. If you want to use Atari BASIC, this is the version to choose. It is installed in certain 600XL and 800XL computers, and then on all subsequent computers. It is also available as a cartridge (also CXL4002).
A PRINT PEEK(43234) gives 234 if you have this version.
If your 600XL/800XL has the embedded Atari BASIC "REV. B", get a "REV. C" cartridge to override the embedded version.
You can download them all in the "ROM-Images" section of the "Atari BASIC" web page on AtariWiki.org.
Outstanding editor
The Atari BASIC editor offered enormous flexibility compared with other computers of the time.
Please read the "Essential keyboard shortcuts" section from the "Using an Atari 8-bit computer - Golden rules" article in the knowledge base.
Want to modify an existing line with Atari BASIC? Display it on the screen. Move your cursor using the arrows. Make the changes you want and press "RETURN". Your line has been modified without having to retype it entirely.
Editing a line in the Atari BASIC editor, without retyping it all!
For the video: Altirra emulator, Atari 800XL, PAL, 1983 OS Rev. 2.
Want to add a line that closely resembles an existing line in Atari BASIC? Display it on the screen. Move your cursor using the arrows. Give it a new line number. Make the desired changes and press "RETURN". Your new line has been created with a minimum of effort.
Create new lines based on existing ones in the Atari BASIC editor, without typing them all!
For the video: Altirra emulator, Atari 800XL, PAL, 1983 OS Rev. 2.
You can edit a program line that occupies up to 3 lines on the screen, i.e. 114{6} (38 columns * 3 lines ) characters. The editor will buzz when you get dangerously close to the limit at the end of the 3rd line.
{6} As you can see, "READY" is displayed in the 3rd column, because the editor does not use the first 2 columns as standard. If you want to use them, type the POKE 82,0 instruction. You now have 40 columns * 3 lines = 120 characters to edit your program lines.
How did you do it with most other computers at the time?
Want to change 1 character in an existing line? Retype it entirely!
Want to add a line that looks very similar to an existing line? It doesn't matter, just type it entirely!
Tedious, isn't it?
Syntax check on line entry
The Atari BASIC editor immediately checks the syntax of any line you add to the program. If you've entered something incorrectly, you'll know straight away and can correct it easily, without even needing to run the program. Atari BASIC shows you clearly where the passage is that it cannot understand or decode. This is probably where your syntax error lies.
Find out about the syntax errors while you type a new line, and correct it immediately!
For the video: Altirra emulator, Atari 800XL, PAL, 1983 OS Rev. 2.
In this example, the word "PRUNT" was not recognised by Atari BASIC as being the name of an instruction. Therefore, Atari BASIC assumed that "PRUNT" was a new variable, not yet in use. After the name of this variable, Atari BASIC expects to find an = sign to assign a value to this variable, and not a string of characters between quotes. So the editor thinks that this is where the error lies. With this indication, a human being can easily find where the error is situated.
What did you do with most other computers at the time? You typed in completely incorrect lines, which were accepted without question. Then you discovered the errors one by one, with a cryptic "SYNTAX ERROR" message when you used the program. So you had to test every possible scenario to run each line of your program and its routines at least once to make sure that at least there were no syntax errors anywhere. Tedious, even unrealistic.
Long names for your variables
In the Atari BASIC editor, a program line can occupy up to 3 lines on the screen (114 or 120 characters, see above). Your variables can have a meaningful name that occupies all this available space. To simplify things, I'll say that a variable can have a meaningful name of at least 100 characters, with ALL the characters being meaningful.
In Atari BASIC, the following two variables are therefore different, they are two distinct variables:
MAXIMUMNUMBEROFSECTORSONDISK=720MAXIMUMNUMBEROFSECTORSONHARDDISK=10240
What did you do with most of the other computers of the time? Well, with the other computers of the time, it was much more limited. On the Commodore 64, for example HOME and HOUSE are in fact the same variable, because only the first 2 characters "HO" are significant.
Another huge advantage over the competition is that a variable can occupy all the memory at its disposal. A character string is not limited to 128 or 255 characters as on the C64. With Atari BASIC, a character string can be 32,000 characters long (i.e. more than 31K). The following program will not cause any errors in Atari BASIC on an Atari computer with 64 KiB of RAM: 10 DIM MYSTRING$(32000).
Pre-compiling interpretor
Atari BASIC is not a compiled language. This would be absurd and abusive to say so. But this is not exactly a interpreted language either. In fact, it is something between the two. In the "Atari BASIC Source Book", the author of the book describes Atari BASIC as a "pre-compiling interpreter".
The moment an additional program line is accepted by the Atari BASIC editor, its syntax is checked and at the same time it is transformed into a succession of "tokens" to be stored in memory. We say that the program is "tokenized".
This offers several advantages:
- Firstly, in the vast majority of cases, the line takes up less space in RAM memory than a line stored "as is", textually. In fact, it is the same tokenized format, which is more compact, that is used by the
SAVEorCSAVEinstruction. - At runtime, Atari BASIC no longer needs to try to parse the line and check its syntax: this has already been done. Instead, Atari BASIC simply executes the tokens, one by one. It's much quicker.
- Finally, you won't be surprised by a "Syntax error" message because the tokenized program to be executed contains no syntax errors.
Note that Microsoft BASIC tokenizes the keywords of the language. Atari BASIC tokenizes everything: keywords, variables, constants, operators, etc.
Abbreviations
The Atari BASIC editor allows you to use abbreviations instead of typing the full names of longer instructions. The full list of abbreviations is given in all Atari BASIC manuals. You can also find a complete list in the "Abbreviations" section of the "Atari BASIC" web page on AtariWiki.org.
They generally consist of a few characters followed by a full stop. For example, POS. stands for POSITION; GR. stands for GRAPHICS. This is the shortest length given here. You are free to continue typing additional characters before the full stop. For example, S., SA. and SAV. will all be interpreted as SAVE. Out of curiosity, the full stop alone is the abbreviation for REM.
| Instruction | Abbreviation | Instruction | Abbreviation | Instruction | Abbreviation |
|---|---|---|---|---|---|
| BYE | B. | GOSUB | GOS. | PR. | |
| CLOAD | CLOA. | GRAPHICS | GR. | PUT | PU. |
| CLOSE | CL. | INPUT | I. | RAD | RA. |
| COLOR | C. | LET | LE. | READ | REA. |
| CONT | CON. | LIST | L. | REM | . |
| CSAVE | CS. | LOAD | LO. | RESTORE | RES. |
| DATA | D. | LOCATE | LOC. | RETURN | RET. |
| DEG | DE. | LPRINT | LP. | RUN | RU. |
| DIM | DI. | NEXT | N. | SAVE | S. |
| DOS | DO. | NOTE | NO. | SETCOLOR | SE. |
| DRAWTO | DR. | OPEN | O. | SOUND | SO. |
| ENTER | E. | PLOT | PL. | STATUS | ST. |
| FOR | F. | POINT | P. | STOP | STO. |
| GET | GE. | POKE | POK. | TRAP | T. |
| GOTO | G. | POSITION | POS. | XIO | X. |
This makes it possible to enter program lines much more quickly and succinctly.
Note that:
- The Atari BASIC editor will show you the full (unabbreviated) name of all your instructions with the
LISTinstruction. - The
LISTinstruction will also add spaces around variables and keywords to make listings more readable.
Using abbreviations in the Atari BASIC editor
For the video: Altirra emulator, Atari 800XL, PAL, 1983 OS Rev. 2.
Be careful, though. You can enter a line of program of up to 3 lines in the editor, using and abusing abbreviations. Again, the editor will buzz when you get dangerously close to the limit at the end of the 3rd line. But, watch out, once the line is listed with the LIST instruction, if the result is more than 3 lines long, you won't be able to modify it: you'll have to retype the whole line.
Abusing and using too many abbreviations in the Atari BASIC editor
For the video: Altirra emulator, Atari 800XL, PAL, 1983 OS Rev. 2.
Why is L. the abbreviation for LIST and not for LET, LOAD, LOCATE or LPRINT?
Because the list of instructions has been implemented in a very specific order in memory. The search stops as soon as a candidate has been found.
Since the LIST instruction appears before all the others in the listing, L. will be the abbreviation for LIST. Using the same logic, since LOAD appears before LOCATE in the listing, LO. will be the abbreviation for LOAD.
List of Atari BASIC instructions, in the order they appear in memory
For the video: Altirra emulator, Atari 800XL, PAL, 1983 OS Rev. 2.
Synonyms
PRINT and ? are synonymous.
Both execute the same code, PRINT. The Atari BASIC editor will keep ? in the listing and will not replace it with PRINT.
GOTO and GO TO are synonymous.
Both execute the same code, GOTO. The Atari BASIC editor will keep GO TO in the listing and will not replace it with GOTO.
I=10 and LET I=10 are synonymous.
Both will assign the value 10 to the variable I. In the first case, the LET instruction is said to be implicit. The Atari BASIC editor will not insert a LET in the listing where it is implicit.
Accepts lines from any device
By default, the Atari BASIC editor expects to receive its new program lines from a user who is busy typing them on the keyboard. But this is only one possibility. The editor can accept new program lines from any device, manufactured by Atari or by a third-party vendor, provided that this device was first added in the RAM-based HATABS{7} table and correctly initialised.
{7} Please read the "Error 130" section from the "Error messages" article in the knowledge base to find out all about this HATABS table.
This provides incredible flexibility.
Of course, you can read a program from a diskette with LOAD "D1:MYPRG.BAS", RUN "D1:MYPRG.BAS" or ENTER "D1:ROUTINE.LST". Or you can read a program from a cassette tape with the instructions CLOAD, LOAD "C:", RUN "C:" or ENTER "C:".
But all the instructions used to load a program — LOAD, CLOAD, RUN and ENTER — can actually accept new program lines from any device defined in HATABS.
If you have a modem defined as M: in the HATABS table, then the ENTER "M:" instruction will receive program lines from a modem.
If you have a punch tape reader defined as T: in the HATABS table, then the ENTER "T:" instruction will allow you to receive program lines from a program recorded on a punched paper tape.
If you use the great Altirra emulator, you can enable the use of an H: device, which from the Atari will look like a giant hard disk (in practice, a folder on your host computer). The ENTER "H1:MYPRG.BAS" instruction will allow you to load a program from this H: hard disk.
Accepts syntactically incorrect lines
In a previous section, I explained that new program lines are immediately examined by the Atari BASIC editor to check their syntax. I should add that lines identified as syntactically incorrect are deliberately retained in the program: they are considered to be special comment lines — special in the sense that they cause an error if an attempt is made to execute them.
They will look like this when listed:
10 ERROR- MY INCORRECT LINE
In the section above, I explained that new program lines could be accepted from any device listed in the HATABS table.
By combining these two possibilities, Atari BASIC allows you — for example — to receive by modem a Microsoft BASIC program formatted as an Atari text file and available somewhere on a server. The Atari BASIC editor will receive the lines one by one. If the syntax between the two BASICs is the same, the line will be accepted immediately. If the syntax differs between the two BASICs, the line will be added as an incorrect line. When the whole program has been loaded, you can list it, stop at the incorrect lines and reformulate them with their equivalent in Atari BASIC.
For instance, you can load this program:
10 DIM A$(20),B$(20)
20 A$="FIRST "
30 B$="SECOND"
40 A$=A$+B$
50 PRINT A$
Line 40 will create this error when entered:
40 ERROR- A$=A$+B$
But you'll be able to correct it later to:
40 A$(LEN(A$)+1)=B$
Last but not least, you don't have to correct everything straight away. You can perfectly save your program, even if it contains syntactically incorrect program lines.
Can run very large programs
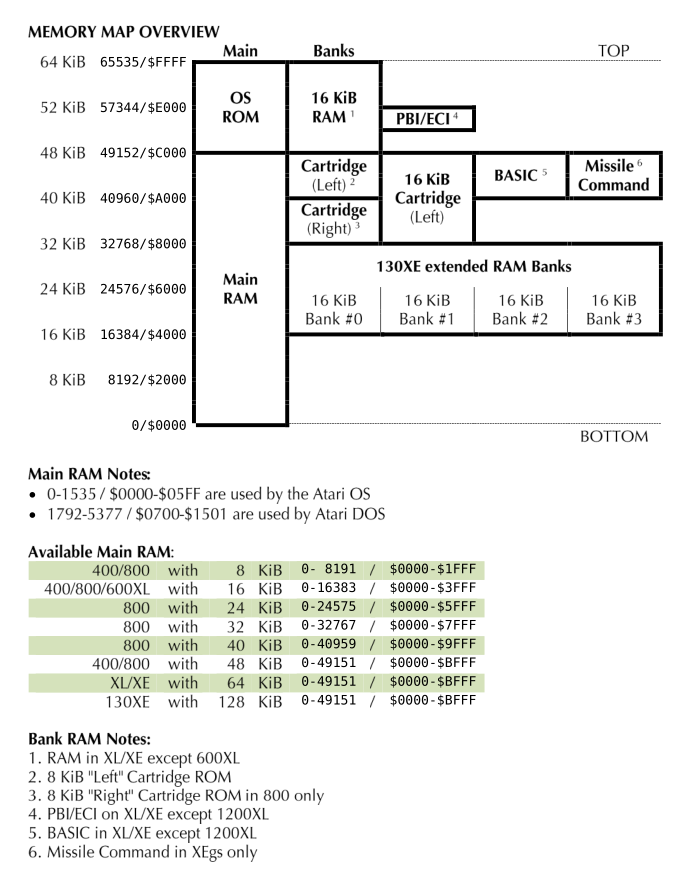
Computers in those days didn't have much RAM compared with the almost "hassle-free" situation we have today with 8, 16, 32 or 64 GiB of RAM. Yet 64 KiB in the early 80s was already a huge improvement for affordable home computers: I worked in a bank that had black & white photos of its mainframe from the 60s ... which was equipped with 64 KiB, occupied a substantial volume and floor space, and had probably cost a fortune.
The 6502 CPU/microprocessor can address, i.e. manage, 64 KiB of memory, from address $0000 to $FFFF (0 - 65,535). But this includes both ROM and RAM. An Atari 800 with 48 KiB of RAM and an Atari 1200XL with 64 KiB of RAM offered almost the same amount of free memory available for a program written in BASIC, i.e. about half of that 64 KiB. This was very confusing for a novice.
For any reasonably ambitious management program with a lot of options, this wasn't enough. Fortunately, Atari BASIC had several solutions to this problem.
Solution #1: Chaining programs
Since in Atari BASIC all instructions can be used either in immediate execution mode or in a program, it is perfectly possible to include an instruction such as RUN "D:MODULE2.BAS" in a program.
Without any user intervention, the next module "MODULE2.BAS" will be loaded into memory and executed. A major drawback, however, is that a RUN "D:MODULE2.BAS" is the equivalent of a NEW, LOAD "D:MODULE2.BAS" and RUN. As a result, the variables & values of these variables used by the first module are lost when you switch to the second module with RUN "D:MODULE2.BAS".
Once again, there are several solutions to this problem of sharing variables & values of these variables between modules:
- Store all the values to be transmitted from one module to another in a temporary file on diskette
- Reserve a RAM memory space where you can manually store and retrieve variable values using
POKEandPEEKinstructions
Solution #2: Self-modifying program, simple changes
The Atari BASIC editor has a very interesting property. By default, this editor is opened by Atari BASIC with the equivalent of OPEN #0,12,0,"E:", which allows information to be read from the keyboard and displayed on the screen. The Atari BASIC user cannot close this IOCB #0, nor re-open it to modify it.
However, a POKE instruction placed in the right memory location can change mode 12 into something else... A POKE 842,13 switches the Atari BASIC editor to the equivalent of OPEN #0,13,0,"E:". In this very strange mode, the Atari BASIC editor presses [RETURN] automatically on your behalf ... Just display/print new lines and instructions on the screen, reposition the cursor, and let the magic begin.
All you have to do is:
- Clear the screen
- Print on the screen the few lines you wish to add / modify / delete
- Print
CONT,RUNor aGOTO <line number>below it - Position the cursor at the top of the screen
- Switch to mode 13 with a
POKE 842,13
A self-modifying program in Atari BASIC, #1
For the video: Altirra emulator, Atari 800XL, PAL, 1983 OS Rev. 2.
Before your astonished eyes, the Atari BASIC editor presses [RETURN] automatically for each line, which causes the desired changes in the program (lines added / modified / deleted), then resumes execution thanks to the RUN, CONT or GOTO instruction.
You can even blank out the screen while you proceed to hide all this "internal cuisine" from the computer user.
In practice, the program being executed has modified itself. Lines were added, modified or deleted, and still you kept the existing variables & values of these variables during the whole process.
Solution #3: Self-modifying program, massive changes
The method described above is perfectly usable for modest changes. But for more drastic changes, with a large number of lines to be added / modified / deleted, another solution is available, using the ENTER instruction.
Like LOAD and CLOAD, the ENTER instruction is used to load program lines into memory{8}{9}.
However, ENTER is fundamentally different from LOAD or CLOAD:
LOADandCLOADread files containing an Atari BASIC program in tokenized form, saved withSAVEorCSAVEENTERreads a text file, which contains the program lines in readable, text form, saved withLISTLOADandCLOADdelete the program currently in memory and delete all variables before loading the programENTERdoes not delete the program currently in memory and leaves the variables intact
| Program in RAM, before | Content of "D:CHANGE.LST" file | Program in RAM, after ENTER "D:CHANGE.LST" | Change |
|---|---|---|---|
10 PRINT "ATARI"99 END | 20 PRINT "COMPUTERS" | 10 PRINT "ATARI"20 PRINT "COMPUTERS"99 END | Line added |
10 PRINT "ATARI"99 END | 10 PRINT "A-T-A-R-I" | 10 PRINT "A-T-A-R-I"99 END | Line updated |
10 PRINT "ATARI"99 END | 10 | 99 END(line 10 was deleted) | Line deleted |
{8} To be precise, a text file loaded with ENTER can also contain lines "without line number", i.e. to be executed in immediate execution mode, without adding them to the program in memory.
{9} Note that a program saved with SAVE "C:" can be read by CLOAD, LOAD "C:" or RUN "C:".
But a program saved with CSAVE can only be read by CLOAD.
Likewise, a program saved with LIST "D:CHANGE.LST",first,last can only be read by ENTER "D:CHANGE.LST".
The ENTER instruction does have one drawback, however: if it is executed in a program, it causes the program to stop. But it's quite possible to solve the problem with a little trickery, as in the following example.
A self-modifying program in Atari BASIC, #2
For the video: Altirra emulator, Atari 800XL, PAL, 1983 OS Rev. 2.
But in fact, there is a simpler way of obtaining the same result, without the user's intervention.
The contents of a file loaded by ENTER is treated by the Atari BASIC editor exactly like lines that the user would type on the keyboard. Simply, instead of actually typing them on the keyboard, these lines are supplied by a file on diskette.
So, lines from the file that start with a line number are used to add / modify / delete a line in the existing program in RAM.
But lines from the file that DO NOT start with a line number are executed directly.
To avoid ENTER causing the program to stop and return control to the editor... simply end the file to be loaded with ENTER with a line such as GOTO <line number> which will be executed, and which will allow the program in RAM to continue executing.
A self-modifying program in Atari BASIC, #3
For the video: Altirra emulator, Atari 800XL, PAL, 1983 OS Rev. 2.
Solution #4: Execute unnumbered lines in an external file
The flexibility offered by files read with ENTER is enormous. In short, you can use them to:
- Add lines to the existing program
- Modify lines in the existing program
- Delete lines in the existing program
- Execute instructions, in immediate execution mode, without adding them to the existing program
This last feature opens up extraordinary possibilities, for example to drastically reduce the size of a program in memory.
Let's take a first practical example, with the following program:
10 DIM MYSTRING$(90)
20 MYSTRING$="Lorem ipsum dolor sit amet, consectetuer adipiscing elit. Maecenas porttitor congue massa."
When you run this program, you use up 90 bytes twice. In memory, by executing line 10, you are reserving 90 bytes to store the string of characters. And storing your program line 20 in the computer's memory will also use up (more than) 90 bytes.
On the other hand, if you use ENTER to load a few lines containing the following instructions:
DIM MYSTRING$(90)
MYSTRING$="Lorem ipsum dolor sit amet, consectetuer adipiscing elit. Maecenas porttitor congue massa."
The program line that initialises the MYSTRING$ string variable is executed but not actually stored in the program. These 90 bytes are used just once.
Let's take a second practical example, with the following program:
10 DIM VALUES(6)
11 VALUES(0)=1.2565 : VALUES(1)=1.2565 : VALUES(2)=2.5896
12 VALUES(3)=3.7589 : VALUES(4)=4.1255 : VALUES(5)=5.6658
13 VALUES(6)=6.9805
20 PRINT "The program continues here"
Perhaps this VALUES array saves you precious time, rather than making sophisticated calculations with SIN, COS, LOG, etc... The fact that the values are already pre-calculated is interesting for your program. However, again in this example, when you run this program, you consume the space taken up by this VALUES array twice. Once by declaring it on line 10. A second time by initialising the whole array in lines 11 to 13.
On the other hand, if you load with ENTER "D1:ONCE.LST" a few lines containing the following instructions:
DIM VALUES(6)
VALUES(0)=1.2565 : VALUES(1)=1.2565 : VALUES(2)=2.5896
VALUES(3)=3.7589 : VALUES(4)=4.1255 : VALUES(5)=5.6658
VALUES(6)=6.9805
GOTO 20
And transform your main program into:
10 ENTER "D1:ONCE.LST"
20 PRINT "The program continues here"
The memory is then used up just once.
As a general rule, if you have long sections in your program that are totally independent from the rest, i.e.:
- Program lines which do not contain any instructions for jumping somewhere (
GOTO,GOSUB, etc.):
they must be executed strictly in the order of the file. - Program lines on which the rest of the program never jumps to (
GOTO,GOSUB, etc...).
Then you can save a considerable amount of memory by storing them in a text file, obviously without line numbers.
Don't forget to end the file with a GOTO <line number> instruction, which will allow the program to resume normal execution once all the lines have been executed.
Conclusion
With all these possibilities, it is possible to create a fairly ambitious BASIC program.
Very good error handling
Without reaching the same level of error recovery as an extremely robust language such as ADA, it is still possible to add "safeguards" to a program written in Atari BASIC, to avoid an error during execution. The Atari BASIC TRAP instruction is used to jump to a particular line in the event of an error during execution.
The TRAP 40000{10} instruction can be used to cancel this error fall-back mechanism. Actually, you must make sure that you have neutralised this TRAP error fall back mechanism — with a TRAP 40000 for example — before terminating the program. Otherwise, an error in immediate execution mode will return to execute the program, where the last executed TRAP instruction tells it to go in the event of an error.
{10} In fact, a TRAP to any illegal 2-byte positive line number (32,769 - 65,535) will disable the mecanism. Most programmers use TRAP 40000, force of habit.
Using the TRAP instruction to handle errors in Atari BASIC
For the video: Altirra emulator, Atari 800XL, PAL, 1983 OS Rev. 2.
In this demo, a division by 0 error in immediate execution mode does not cause an error but returns to the program — in accordance with the TRAP 40 instruction — to execute line 40. To neutralise this, a TRAP 40000 must be inserted before the program ends.
Memory address 195 contains the code of the last error that occurred; addresses 186 and 187 contain the line number of the last error that occurred.
So, in the program lines dedicated to error handling,
a PEEK(195) makes it possible to understand the type of error that occurred,
and a PEEK(186)+256*PEEK(187) reveals where it actually occured in the program.
The excellent "Error Trapping in Atari BASIC" article from ANTIC magazine, available on the AtariMagazines website, perfectly illustrates this mechanism.
A few simple measures can make an Atari BASIC program much more robust to the hazards of its execution.
| Measure | Example |
|---|---|
A TRAP before any INPUT ensures that the user enters the correct type of data. |
For example:10 TRAP 10:INPUT VALUEwill resist a user typing "ten" instead of "10" |
A CLOSE instruction before any OPEN ensures that the desired communication channel is free.Preceded by a TRAP, this combination ensures that you can deal with an impossibility of working with the desired communication channel. |
For example:10 TRAP 100:CLOSE #1:OPEN #1,4,0,"D1:FILE.DAT"20 REM PROCESSING OF DATA30 TRAP 40000:REM DISABLE TRAP40 CLOSE #199 END100 PRINT "Error "; PEEK(195) ;" while executing line "; PEEK(186)+256*PEEK(187)101 PRINT "Cannot read file D1:FILE.DAT"102 PRINT "Check disk drive and diskette"103 PRINT "Type 0 to retry, any digit to abort"110 TRAP 110:INPUT YOURCHOICE120 IF YOURCHOICE=0 THEN GOTO 10130 TRAP 40000:REM DISABLE TRAP140 CLOSE #1150 ENDwill resist a floppy disk drive not available, a file not available, etc |
A TRAP before any instruction that positions the cursor on the screen (POSITION, LOCATE, PLOT, DRAWTO, etc.) ensures that you do not unintentionally go beyond the limits of the screen. |
For example:10 GRAPHICS 020 TRAP 100:POSITION 18,4:? "Hello"30 TRAP 100:POSITION 180,5:? "World"40 TRAP 40000:REM DISABLE TRAP50 END100 PRINT "Error "; PEEK(195) ;" while executing line "; PEEK(186)+256*PEEK(187)110 ? "Out of bound"120 TRAP 40000:REM DISABLE TRAP130 ENDwill resist an attempt to plot/write something outside the screen boundaries |
A TRAP before any sensitive mathematical operation (division, etc) ensures that you are not attempting a mathematically forbidden calculation (division by zero) or one that is simply out of bounds. |
For example:10 GRAPHICS 020 TRAP 20:INPUT VALUE30 TRAP 60:PRINT 133/VALUE40 TRAP 40000:REM DISABLE TRAP50 END60 PRINT "Error "; PEEK(195) ;" while executing line "; PEEK(186)+256*PEEK(187)70 PRINT "133 cannot be divided by ";VALUE80 TRAP 40000:REM DISABLE TRAP90 ENDwill resist a user typing "ten" instead of "10" as well as an attempt to divide the value by zero |
Limited use of PEEK & POKE
Unlike other BASICs for computers of the same period, the Atari BASIC is rich enough in instructions not to constantly resort to PEEK & POKE instructions.
This over-reliance on PEEK & POKE is the hallmark of a BASIC that is not very advanced, and that is sorely lacking in the vocabulary of instructions available to take advantage of the computer on which it is running.
On the Commodore 64, for example, Microsoft BASIC V2 takes absolutely no advantage of the C64's improvements over its ancestor, the PET, for which it was initially designed. The use of PEEK & POKE instructions is permanent, even if you just want to take advantage of the C64's excellent graphics and sound capabilities. As a result, BASIC program listings for C64 quickly become incomprehensible, except to C64 experts who can understand what these instructions are really for.
Note that in Atari BASIC — and this is a pity — it is nevertheless compulsory to use the PEEK & POKE instructions to build and manage sprites (players-missiles in Atari's vocabulary).
Atari BASIC does, however, allow you to manage all the basic functions relating to graphics, sound and joysticks.
Documentation to be improved
The quality of the Atari BASIC documentation supplied to users has varied greatly over the years. Excellent in the days of the 400/800 then 1200XL, abominable in the days of the 600XL and 800XL, then very good again for the 65XE, 130XE, 800XE (and XEgs).
What is extremely regrettable is that at a time when the competition from the Commodore 64 was at its fiercest, at a time when it was most important, the Atari BASIC documentation supplied with the 600XL and 800XL was the most mediocre, because it was reduced to the bare minimum.
The C64 documentation was really excellent — and a really good idea considering the frequent use of Microsoft BASIC V2's PEEK & POKE with the C64. This is a hardback book with a spiral binding — a spiral binding that is essential for a technical manual that you have to be able to put on the table and keep wide open. It is around 170 pages long, of which around 75 are devoted to BASIC, in a section that is abundantly illustrated and accompanied by examples.
The comparison with Atari documentation, at the same time, is very cruel. The Atari BASIC manuals of the 600XL and 800XL period are ridiculously succinct. The introduction says it all: this is not really a manual, just a reference guide. The international version offers a manual in several languages... which is in fact only 9 pages long.
The user, who has just spent the equivalent of a month's salary for a worker, is invited to buy one or more books to learn about programming, see examples and delve deeper into the subject.
The Atari BASIC manual simply lists all the BASIC instructions and functions, with an explanation that sometimes takes up just 2 lines. You know, the kind of succinct manual that contains such rubbish as "The 'Intensity' button is used to adjust the intensity". In short, unusable for a beginner. Worse than useless: it could disgust a complete beginner. Why offer one of the best BASICs for beginners if you're going to ruin all your efforts with such a shoddy manual?
A monstrous mistake on Atari's part, which the magazines of the time were quick to point out.
You can download them all in the "Manuals" section of the "Atari BASIC" web page on AtariWiki.org.
Speed — A software issue
There's no denying that, as it stands, Atari BASIC is slow. As I wrote above, in theory, any BASIC is definitely not designed to create arcade-style video games, but rather to allow a beginner to familiarise themselves with the concept of programming. So, I can understand that this wasn't Atari's priority in the technical specifications. But it's a shame, because with a few adjustments, external companies have managed to create other BASICs that are fully compatible with Atari BASIC, but much faster and more powerful, for the same computer of course.
I quote the excellent article about "Atari BASIC" from en.wikipedia.org.
In theory, Atari BASIC should run faster than contemporary BASICs based on the Microsoft pattern. Because the source code is fully tokenized when it is entered, the entire tokenization and parsing steps are already complete. Even complex mathematical operations are ready-to-run, with any numerical constants already converted to the internal 40-bit format, and variables values are looked up by address rather than having to be searched for.
Atari BASIC's relative slowness can be explained by 3 distinct causes, which are solely problems caused by the software, and not by the Atari hardware:
- Atari BASIC does not implement the integer type. With the exception of line numbers — which are stored in RAM memory as a 2-byte integer in the tokenized program — all other integers in the program, as well as all numeric variable values, are encoded in BCD{11}, that is Binary-Coded-Decimals. This leads to intensive use of the FPP (Floating Point Package) routines implemented in ROM, which are frequently called upon to convert the integer format to BCD and vice versa. Unfortunately, the FPP routines are far from optimised, even though they are used extensively by Atari BASIC.
- Atari BASIC also differs from other BASIC implementations in that when an instruction of the
GOTOorGOSUBfamily must branch to a particular line number, the search for this line number is done systematically from the first line of the program... Instead of checking whether the number you are looking for is before or after the current line — the one being executed — which would save time, the search is made from the first line of the program. - The third cause is a consequence of the flexibility implemented by Atari BASIC. With Atari BASIC, a program can modify itself. In other words, during its execution, program lines can be moved, deleted or added. When the
NEXTcorresponding to aFORloop is executed, it must look for the location of the correspondingFOR— which may have moved. So it has to look for it, which causes a slowdown because of the issue mentioned above. In other BASICs from the same period, theFORinstruction cannot move, so its memory address is stored and the correspondingNEXTcan find it immediately.
{11} The Binary Coded Decimal (BCD) notation is important for the 6502 CPU/microprocessor because it allows the processor to handle decimal arithmetic directly. BCD ensures that decimal calculations are accurate and free from the rounding errors that can occur with binary floating-point arithmetic. This is particularly useful in applications where precise decimal calculations are required, such as financial and business software.
The bad news is that some journalists, either not having studied the subject sufficiently or being unscrupulous, were quick to conclude that Atari computers were slow. This is not true. It is Atari BASIC's implementation of the BASIC language that is slow, not the computer itself.
The good news is that it is very easy to remedy this problem, simply by using another BASIC. There are many alternatives.
Alternatives to Atari BASIC
These alternatives are backwards compatible with Atari BASIC.
This means that they can run a program originally written for Atari BASIC, without making any changes:
- OSS, whose founding members wrote Atari BASIC for Atari, are well placed to know exactly what needs improving and how to do it. OSS has come up with various versions over the years, all of them improved versions of the previous one. Chronologically: "OSS BASIC A+", then "BASIC XL" and finally "BASIC XE". While you're at it, try the latest version, "BASIC XE".
- "Turbo-BASIC XL", released in 1985, was written by the late Frank Ostrowski, who was also the author of "GFA BASIC" for the Atari ST. This "Turbo-BASIC XL" has long been the benchmark in terms of performance and the wealth of new instructions available to the user. It was my favourite at the time.
- "Altirra BASIC" was created by Avery Lee, the developer of my favourite emulator: Altirra. This BASIC has been completely rewritten, from scratch. Like "Turbo-BASIC XL", it is very fast and packed with new instructions. The latest version is supplied with the emulator, on the "additions.atr" diskette. This is the
ATBASICX.COMprogram.
These alternatives are NOT backwards compatible with Atari BASIC.
This means that a program originally written in Atari BASIC will have to be adapted or rewritten to work:
- Microsoft BASIC was so widespread on many computers at the time that not offering it was almost a handicap. As mentioned in the "History" section above, two versions were offered: Atari Microsoft BASIC (later referred to as, I), and then Atari Microsoft BASIC II.
- Fast BASIC is a contemporary BASIC whose first version was published in 2018. Very modern, it does not use line numbers. Very fast, "2 times faster than compiled Turbo-Basic XL" according to its presentation on the Github website.
From AtariWiki.org:
From AtariMania:
From Github:
Speed — Atari BASIC is slow. The 8-bit Atari computers are certainly not.
To show you that it is the Atari BASIC that is slow, and not the computer itself, I simply ran exactly the same program in Atari BASIC and in a few other alternatives. I used the Wilkinson Sieve program, and alternatives BASIC implementations that are 100% compatible with Atari BASIC. In other words, other BASIC variants that can run the same Atari BASIC program without changing a single line.
Finally, to illustrate that it is absurd — in absolute terms — to expect to write super-fast programs in BASIC, I ran the same program converted to OSS Action!
Action! is an excellent language that offers both phenomenal execution speeds and highly readable source code. Of course, you have to learn a new syntax, but you'll still find all the logic and readability of other structured languages, including variables with explicit names, procedures, functions, loops and so on. It's infinitely easier to learn and master than the machine language of the 6502 CPU/microprocessor.
Finally, if it's not too traumatic for the user of your program, you can also turn off the display (black screen) during periods of intense calculations, with a POKE 559,0 (turn off) then a POKE 559,34 (turn on). Of course, you need to warn the user so that they are not surprised, but it may be worth it. By asking ANTIC to cease all display-related activity, you can accelerate execution by 30%.
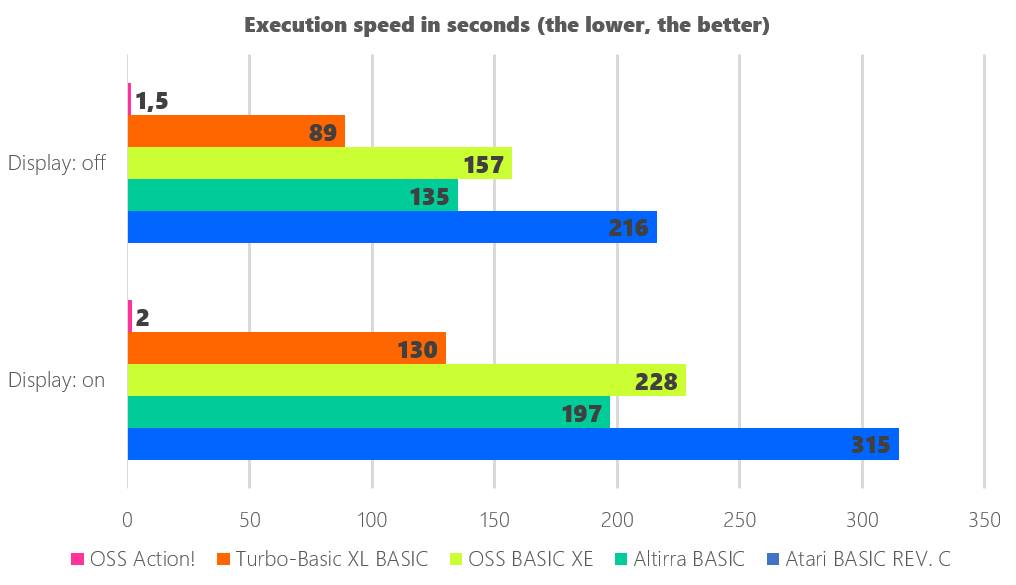
Here are the raw figures. I used the Altirra emulator, with an Atari 800XL in NTSC, with the display on and then with the display off.
| Language | Execution speed in seconds (the lower, the better) | |
|---|---|---|
| Display: on | Display: off | |
| Atari BASIC REV. C | 315 | 216 |
| Altirra BASIC | 197 | 135 |
| OSS BASIC XE | 228 | 157 |
| Turbo-Basic XL BASIC | 130 | 89 |
| OSS Action! | 2 | 1.5 |
Trivia & Fun facts
Curious to see what the listing of your tokenized program looks like? Simply execute the SAVE "S:" instruction in immediate execution mode or in a program to "save" the (tokenized) program on the screen, meaning, to display it on the screen... It's strange to watch but harmless.
The Atari BASIC editor also accepts non-integer numbers as line numbers in a program. These will be sent to the FPP (Floating Point Package) which will translate them into integers.
10.2 REM 10.2 line number
10.7 REM 10.7 line number
will become
10 REM 10.2 line number
11 REM 10.7 line number
The line numbers allowed in an Atari BASIC program are integers from 0 to 32,767 ($0000 to $7FFF). When you type a command in immediate execution mode, it is nevertheless stored in memory, at line number 32,768 ($8000). It is also saved with the rest of the program if you save your program on diskette or cassette tape, for example. It will obviously not be executed when you later load and run the program, but you can read it by examining the file.
Please read the "File names on cassette tapes" section from the "Using an Atari 8-bit computer - Golden rules" article in the knowledge base to discover a very practical indirect use.
All Atari BASIC instructions can be used both in programs and in immediate execution mode. Some combinations make no sense. For example CONT in a program or STOP in immediate execution mode.
END & STOP instructions execute some common routines. It is usual to resume execution of a program stopped by an error or by a STOP instruction with the CONT instruction typed in immediate execution mode. But you may not have suspected that CONT can also resume execution of a program stopped by an END:
10 END
20 PRINT "ATARI"
RUN, executes line 10 and stops the program
CONT, will resume execution at the next line, line 20, and display "ATARI".
The END instruction is very interesting to use in immediate execution mode. Using it will have absolutely no effect on the program in RAM memory. However, it immediately mutes the 4 audio channels and closes all open IOCB communication channels — including files open for writing, which will flush the buffer and close the files cleanly (updating the DOS directory record for this file and free sectors table). This is very useful if your program is stopped by an error, a STOP instruction or if you deliberately press the [BREAK] key.
The Atari computers have 8 IOCB communication channels numbered from #0 to #7, but not all of them are available to an Atari BASIC user.
IOCB #0 is permanently open for the E: editor, and is therefore never available to OPEN or CLOSE for the user.
You can use it, though: PRINT "Hello, world!" and PRINT #0;"Hello, world!" are equivalent.
IOCB #6 can be used for the S: screen, and is used in particular with instructions relating to graphics.
IOCB #7 can be used for input/output commands such as LPRINT, SAVE, LOAD, CSAVE, CLOAD, ENTER and LIST.
In short, to be on the safe side when programming with Atari BASIC, use the IOCB communication channels numbered #1 to #5.
It is not possible to open an IOCB communication channel to S: in read mode, for example with the OPEN #1,4,0,"S:" instruction. This injunction will be ignored; it will not trigger any error. The IOCB to S: communication channel will be open for writing anyway. The following program:
10 OPEN #1,4,0,"S:"
20 PRINT #1;"ATARI"
will display the word "ATARI" on the screen, although in theory it is not possible to write to an IOCB communication channel that is open for reading only.
In immediate execution mode, if you need an endless loop or a command that doesn't give back control to the Atari BASIC editor, use a loop such as
FOR I=0 TO 0 STEP 0:PRINT "ATARI ";:NEXT I
Knowledge base article: kb-software-0005-atari-basic-overview.html
REV. 020.